SAML2 or Security Assertion Markup Language 2.0 is a standard for exchanging authentication and authorization data between security domains. It enables cross- domain single sign on (SSO) by distributing authentication tokens to users.
For the security and convenience of our customers, MailRoute supports SAML2 compatible providers as external authentication for single-sign on capability.
There are two separate sites to set up single sign-on: the service provider configuration, done in the MailRoute Control Panel, and the identity provider configuration done within your SSO system.
(The following has been adapted from Microsoft's SAML/Azure configuration instructions)
To set up with Microsoft Azure
Login to your Microsoft account as an Admin
In the Azure portal, on the left navigation panel, click Azure Active Directory.
To open the single sign-on settings:
-
In the Azure portal, on the left navigation panel, click Azure Active Directory.
-
In the Azure Active Directory blade, click Enterprise applications. The All applications blade opens to show a random sample of the applications in your Azure AD tenant.
-
Click "new application". On the next screen click "create your own application". Type in any name for your new application which will be used for SAML2 auth and save it.
-
Click Single sign-on. Under Single Sign-on, click SAML
Set up Single Sign-On with SAML
1. Basic SAML Configuration
Under Identifier (Entity ID) add: https://admin.mailroute.net/saml2/metadata/
In Reply URL (Assertion Consumer Service URL) add: https://admin.mailroute.net/saml2/acs/
Do not run tests yet, we'll do that later.
2. User Attributes & Claims
You may leave it as is.
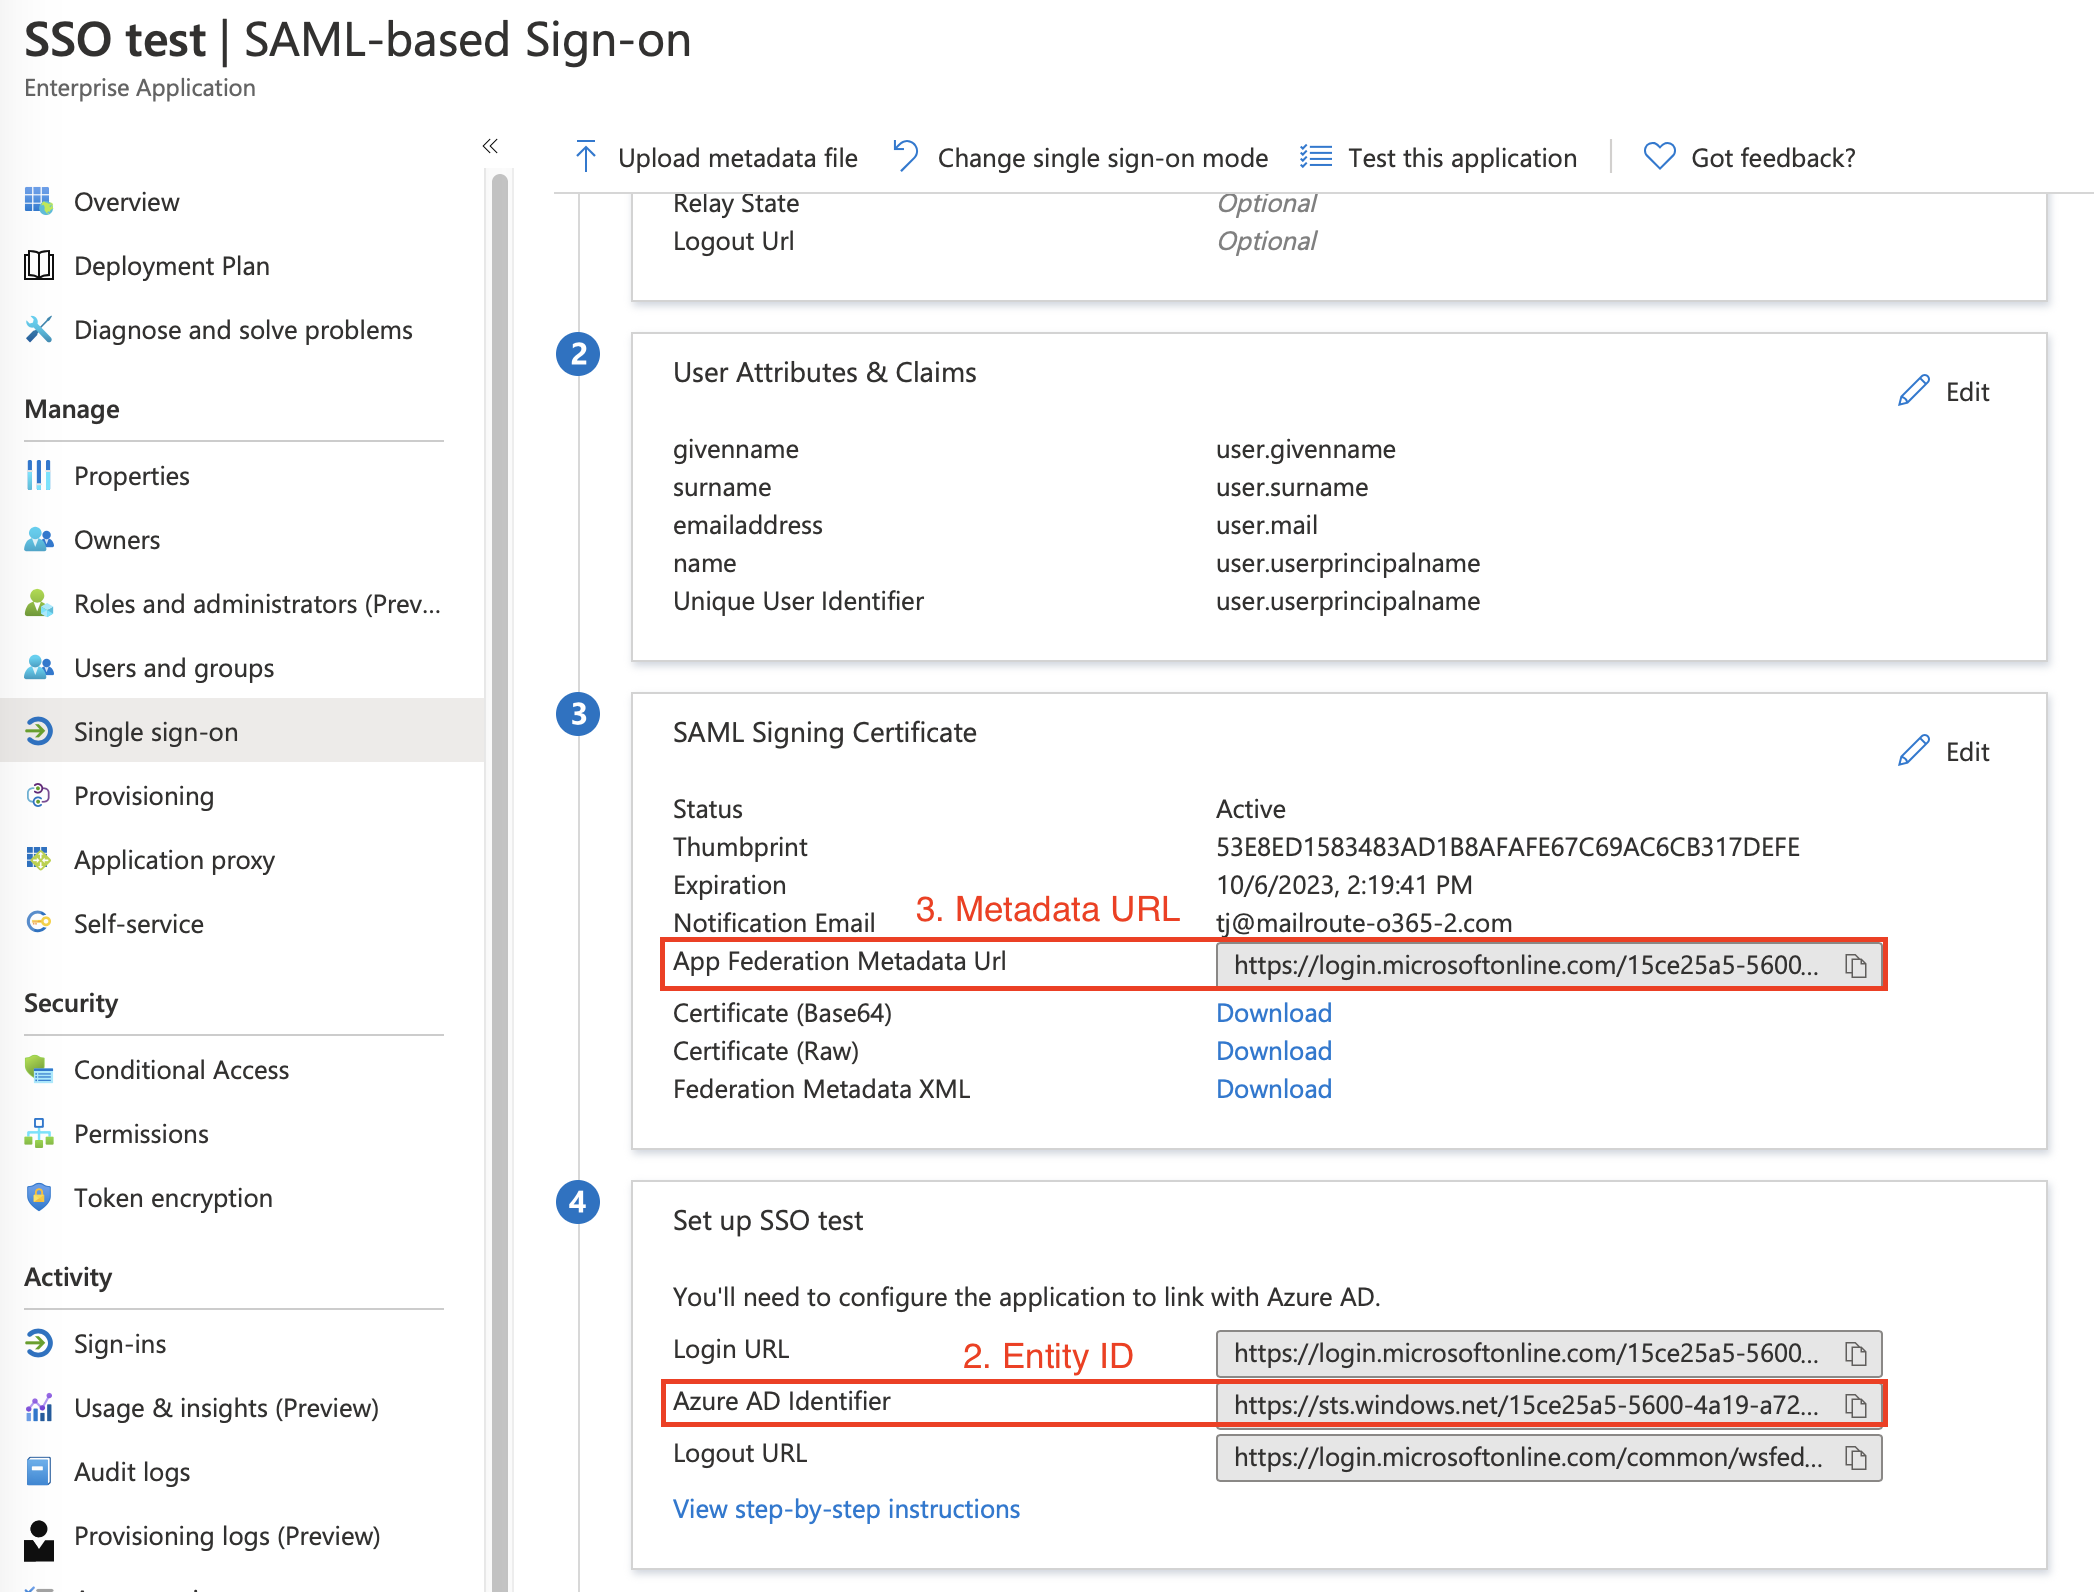
3. SAML Signing Certificate
Azure AD uses a certificate to sign the SAML tokens that it sends to the application.
Click Add a certificate link to create new signing certificate.
Click New certificate. Choose Sign SAML response and assertion in Signing option dropdown and click save to generate new certificate.
Assign users to the application
Microsoft recommends testing the single sign-on with several users or groups before rolling out the application to your organization.
To assign a user or group to the application:
- Open the application in the portal, if it isn't already open.
- In the left application blade, click Users and groups.
- Click Add user.
- In the Add Assignment blade, click Users and groups.
- To find a specific user, type the user name into the Select box, click the checkbox next to the user’s profile photo or logo, and click Select.
- Find your current username and select it. You can optionally select more users.
- In the Add Assignment blade, click Assign. When completed, the selected users appear in the Users and groups list.
Configuring SAML in MailRoute's Control Panel
1. Login to your Admin account in MailRoute's Control Panel.
2. Select External Authentication from the left-hand side tab
3. Select the toggle, Choose External Auth Type and switch to SAML2
In filling in your Provider Settings, please do the following:
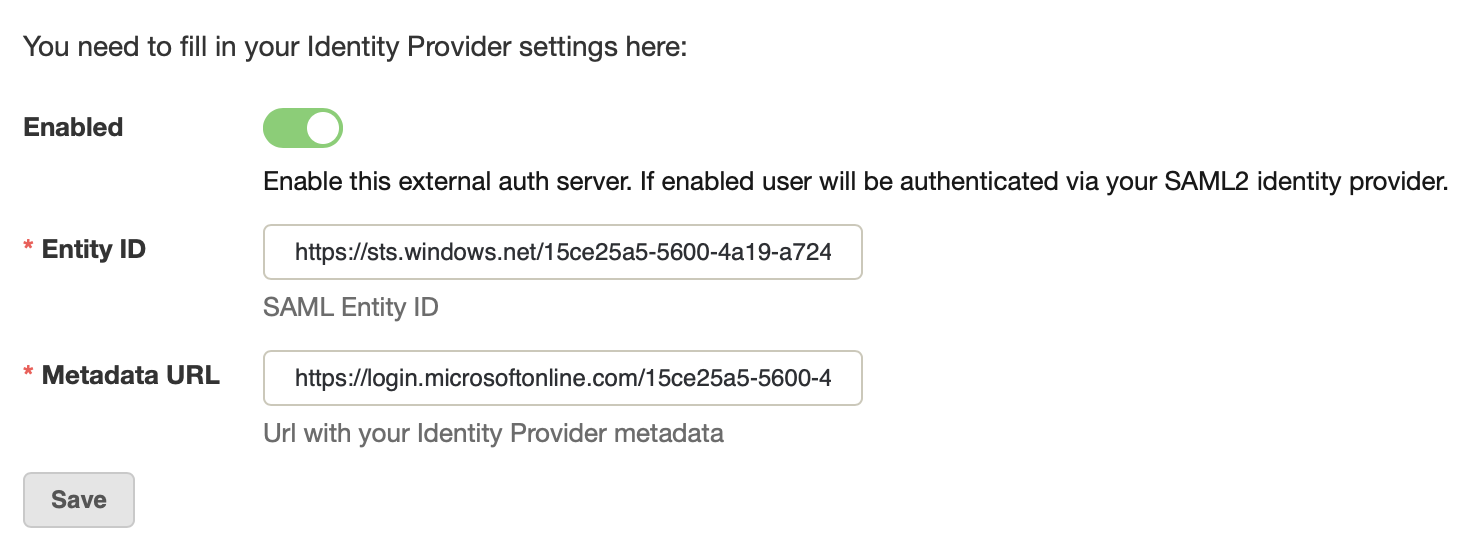
1. Click the Enabled box
2. Entity ID: Please enter the Azure AD Identifier from your Azure app page.
3. Metadata URL: Copy App Federation Metadata Url from your Azure app page.
4. Click Save.
Test single sign-on
You are ready to test your settings.
- Open the single sign-on settings for your application in Azure portal (Azure active directory - Enterprise applications - choose your SAML2 application).
- Scroll to the bottom of the section.
-
Click Test SAML Settings. The testing options appear.
-
Click Sign in as current user. This test lets you first see if single sign-on works for you, the admin.
For more information, please see the Microsoft article here
Comments
0 comments
Please sign in to leave a comment.